
 Pin it
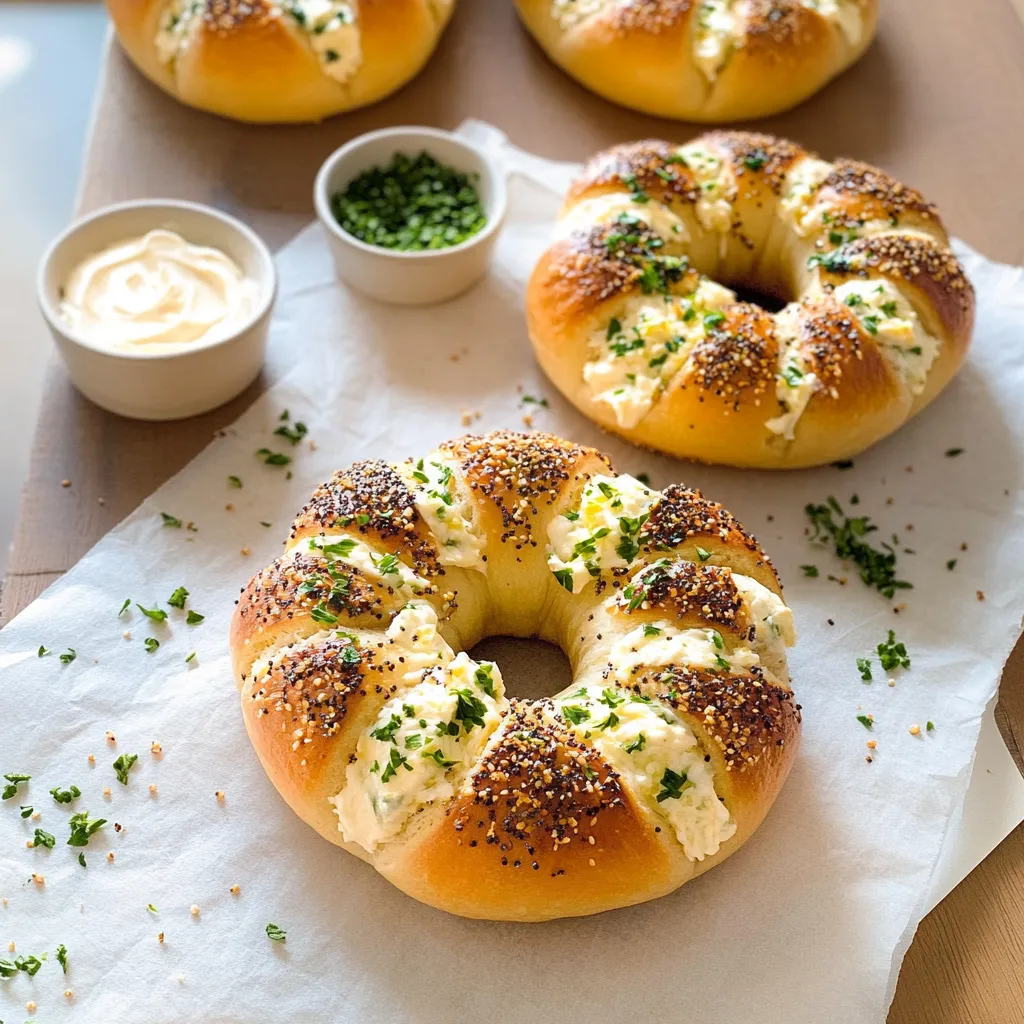
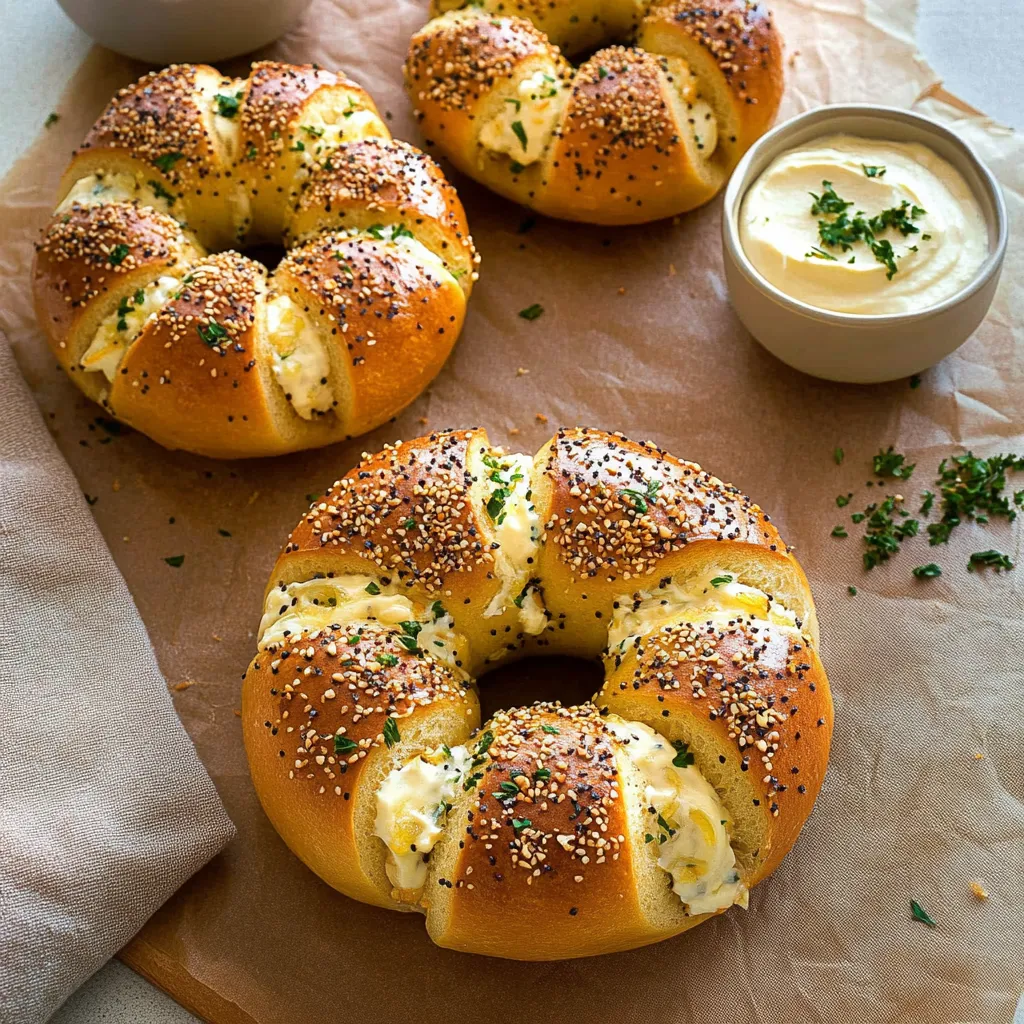
Garlic butter bagels with cream cheese filling bring together sturdy traditional bagel texture with rich garlic butter and zesty cream cheese inside. These super tasty treats give you the perfect mix of smooth, creamy centers and crunchy outsides in every bite, making them an amazing snack or star of your meal.
I came up with this idea during COVID lockdown when we couldn't travel anywhere. Making these homemade versions of Calic Bagels took my family to Korea's food scene without leaving home. My hubby asked for them three weekends in a row and swore they were better than anything he'd eaten at restaurants.
Creamy Filling Ingredients
- Cream cheese: Makes up the main part of the filling, giving it that tangy richness and smooth feel. Go for full-fat kinds for the best texture and let it sit out for at least 30 minutes so it gets totally soft and mixes really well.
- Granulated sugar: Cuts through the tang of cream cheese with a touch of sweetness. We don't use much - just enough to add some depth without making it too sweet, so it works well with the savory outside.
- Sweetened condensed milk: Adds extra smoothness and hints of caramel flavor. This ingredient gives that special Korean cheese taste that makes you want to keep eating these bagels.
- Salt: Makes all the other flavors pop and stops the filling from tasting boring. Just this tiny bit makes everything taste way better by bringing out both the sweet and savory parts.
Fragrant Butter Mixture
- Unsalted butter: Creates the rich base for coating the outside. Good butter with lots of fat tastes better and turns more golden when baked.
- Fresh garlic: Gives the butter amazing smell and flavor you can't get from garlic powder. Chop it really small so it spreads evenly through the mix without big chunks.
- Chopped parsley: Adds bright green color and light herby taste. Fresh works way better than dried for both looks and flavor.
- Whole milk: Helps the coating stick evenly to the bagels. The proteins mix everything together while adding some richness.
- Mayonnaise: Makes everything super rich and keeps the garlic butter mix from separating. The stuff in mayo holds everything together during baking.
- Dried oregano: Adds some Italian flavor that works great with garlic. Its slight pine-like taste cuts through the richness and makes things smell amazing.
- Parmesan cheese: Adds savory umami that makes garlic taste even better while helping everything turn golden when baked. Get freshly grated kind because it melts better.
- Fresh egg: Holds everything together and helps create that nice golden, shiny outside. The proteins help make that perfect crust these bagels are known for.
- Salt: Makes every flavor stronger while balancing the sweetness from the filling. Sea salt or kosher salt works better than regular table salt for flavor.
Bagel Making Steps
- How To Cut Them:
- Put each bagel flat on your cutting board and make six cuts across the top, all the same distance apart. Don't cut all the way through - stop about a quarter-inch from the bottom so the bagel stays in one piece. This makes an accordion shape that holds tons of cream cheese but keeps everything together.
- Adding The Filling:
- Put your cream cheese mix in a piping bag with a medium round tip or just use a sandwich bag with the corner cut off. Stick the tip deep into each cut and gently squeeze while pulling out slowly so the filling gets in evenly. Keep going until all sections have plenty of filling.
- Coating With Butter:
- Make the garlic butter mix right before you need it so it doesn't harden up. Dunk each filled bagel completely in the mix, letting extra drip back in the bowl. The butter should get into all the cuts while covering the whole outside for maximum flavor.
- Baking Them:
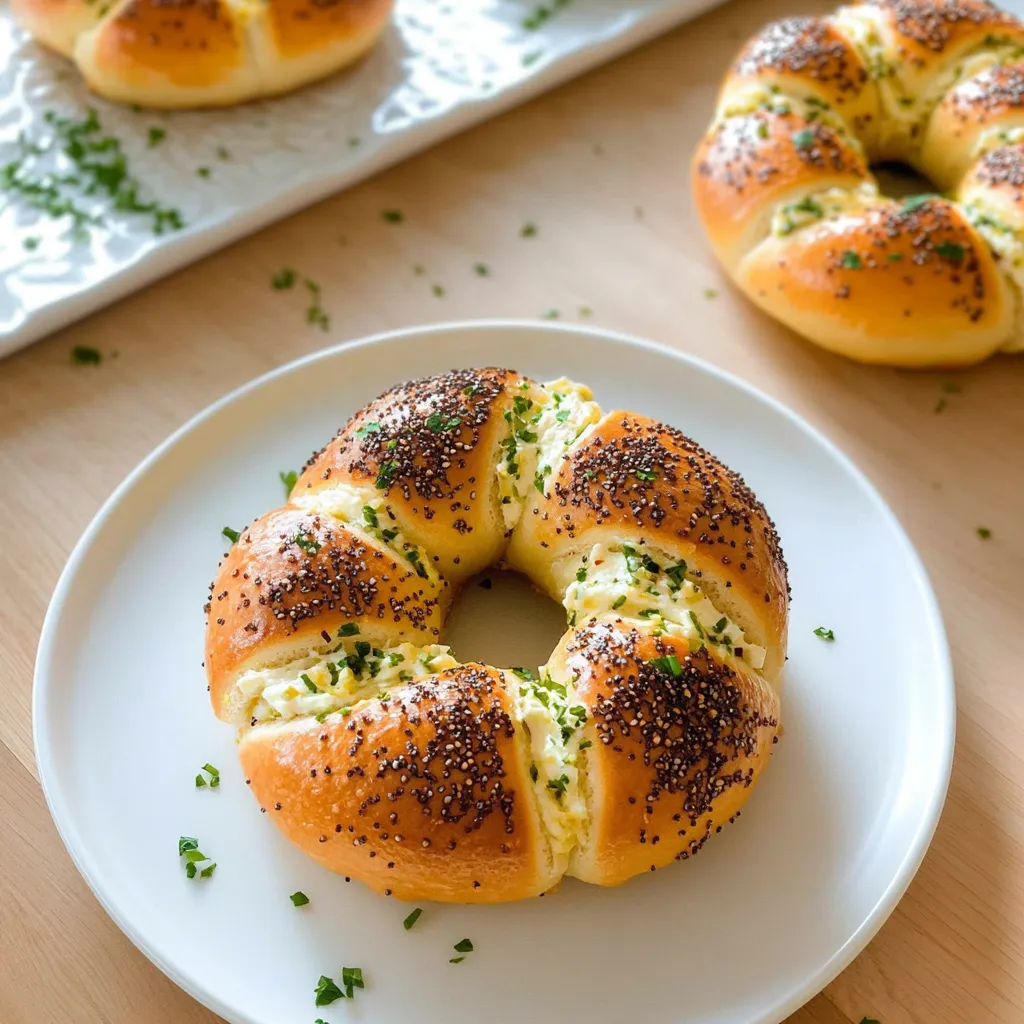
- Put the coated bagels on a baking sheet lined with parchment paper, leaving about two inches between them. Bake at 350°F for 11-13 minutes until they're deep golden but not burned. The filling should be hot all the way through and the outside should be nice and crispy.
- Final Touches:
- Right when you take them out of the oven, sprinkle more chopped parsley and fresh grated parmesan on top of the hot bagels. The heat melts the cheese slightly and makes the herbs release their smell for a better eating experience.
 Pin it
My family loves these bagels for weekend brunches. Even my daughter, who usually doesn't like strong garlic stuff, asks for extra garlic in this recipe. Everyone's always amazed at how different these are from regular bagels, and guests always want to know how to make them.
Ways To Serve
These stuffed bagels taste best when they're still warm from the oven when you get that magic contrast between the crunchy outside and gooey filling. Try to time your cooking so they're just coming out of the oven when your guests show up for the biggest wow factor.
Fun Variations
Try different kinds of bagels besides plain ones for tons of flavor options. Everything bagels add seeds and spices to the mix, while cinnamon raisin bagels create an interesting sweet and savory combo with the garlic butter.
How To Store Them
Let your bagels cool completely, then put them in an airtight container at room temp for up to two days. All the butter in them helps keep them moist and stops them from getting stale too fast like regular bagels do.
 Pin it
These cream cheese stuffed garlic bagels show food fusion at its best. They turn simple ingredients into something amazing through good technique. Whenever I make these for a get-together, everyone goes quiet for a moment when they take that first perfect bite with the crispy garlic outside and creamy filling. These bagels create food memories that stick around long after the last bite.
Frequently Asked Questions
- → Can I use flavored bagels?
- Sure can! While plain or garlic bagels work great, any flavor you love will do the job.
- → What if I don't have Kewpie mayo?
- No worries! Regular mayo works fine, or leave it out altogether if you prefer.
- → Can I make these ahead of time?
- Yep, just prep them up to baking and pop them in the fridge for up to a day.
- → How do I store leftovers?
- Keep in a sealed container in the fridge for three days, then reheat at 300°F for 5-10 minutes.
- → What about freezing them?
- Totally! Freeze after cooling. Let them thaw overnight in the fridge and warm in the oven.