
 Pin it
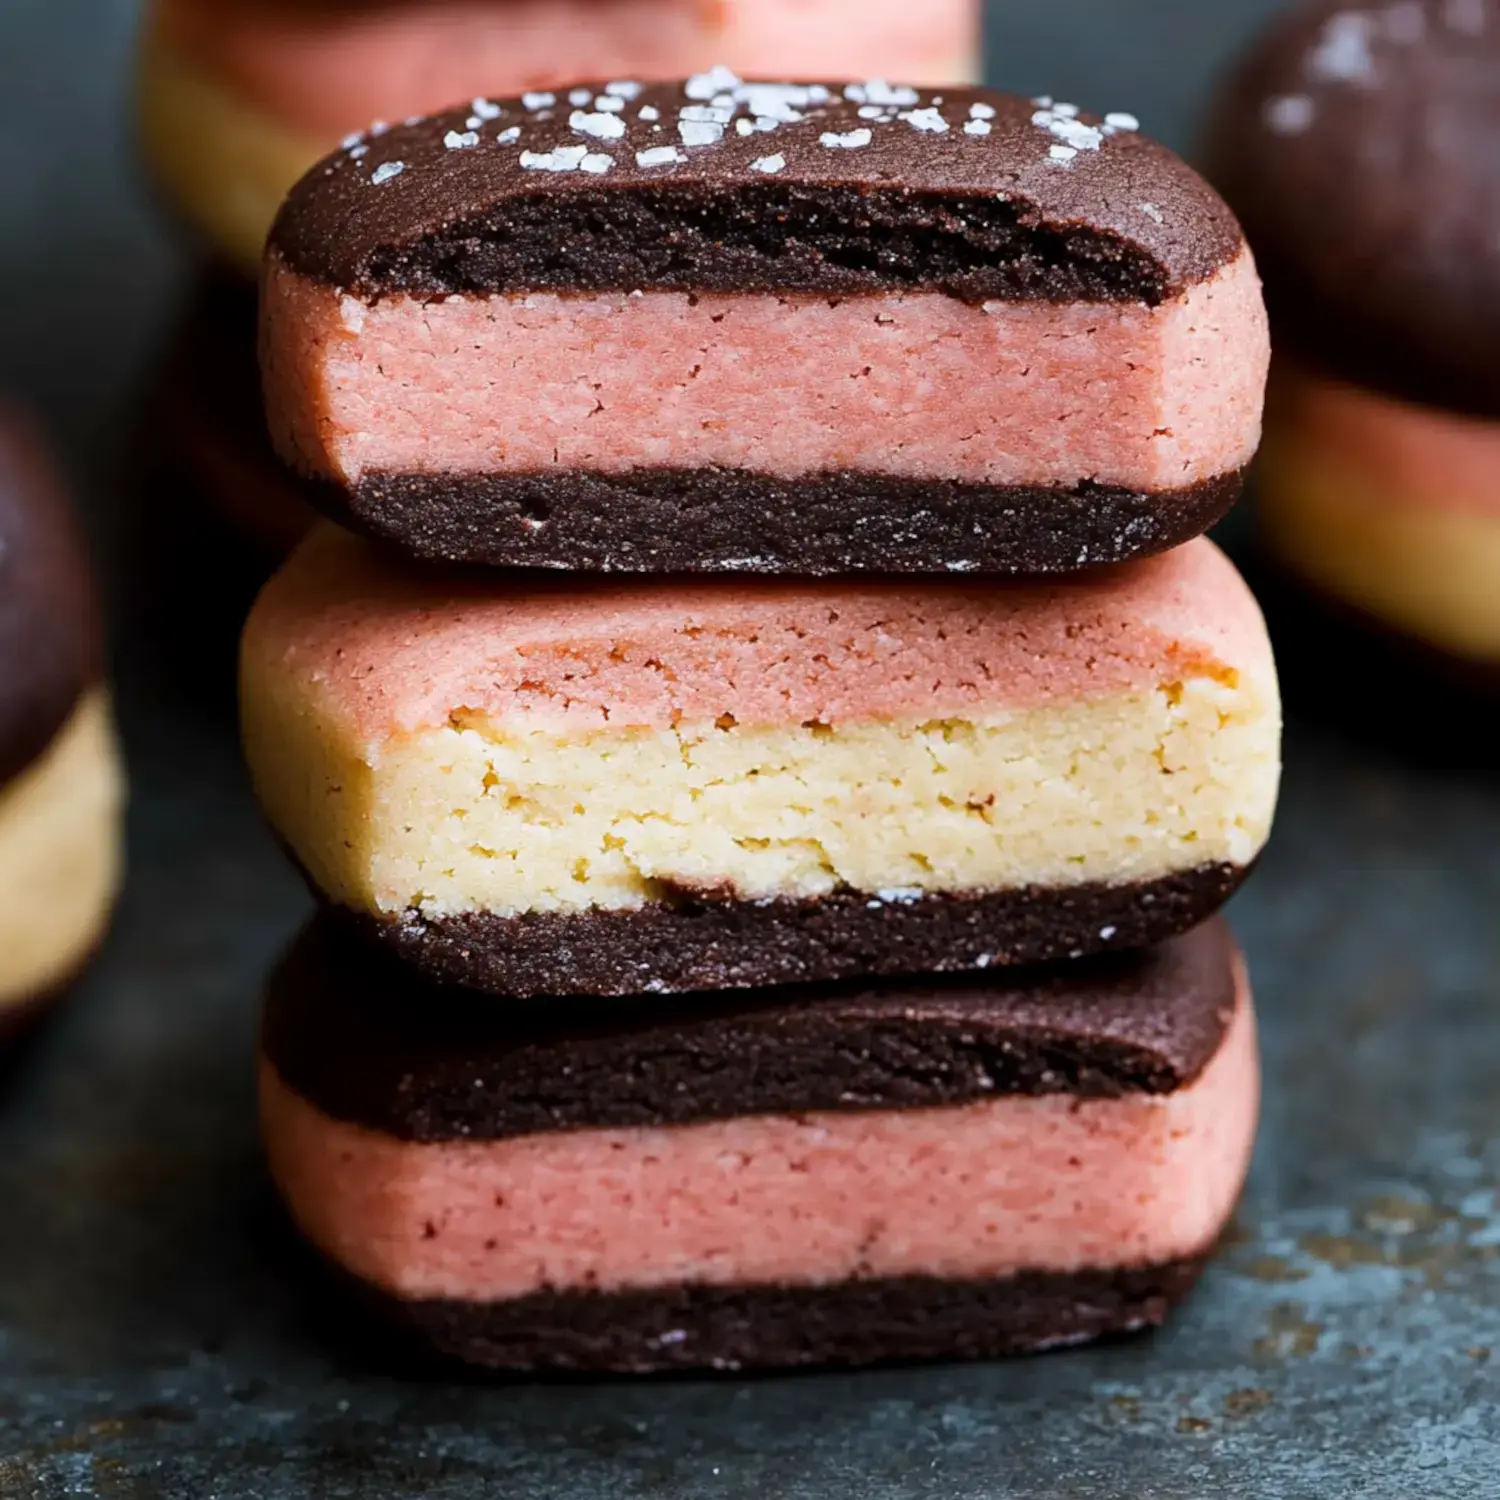
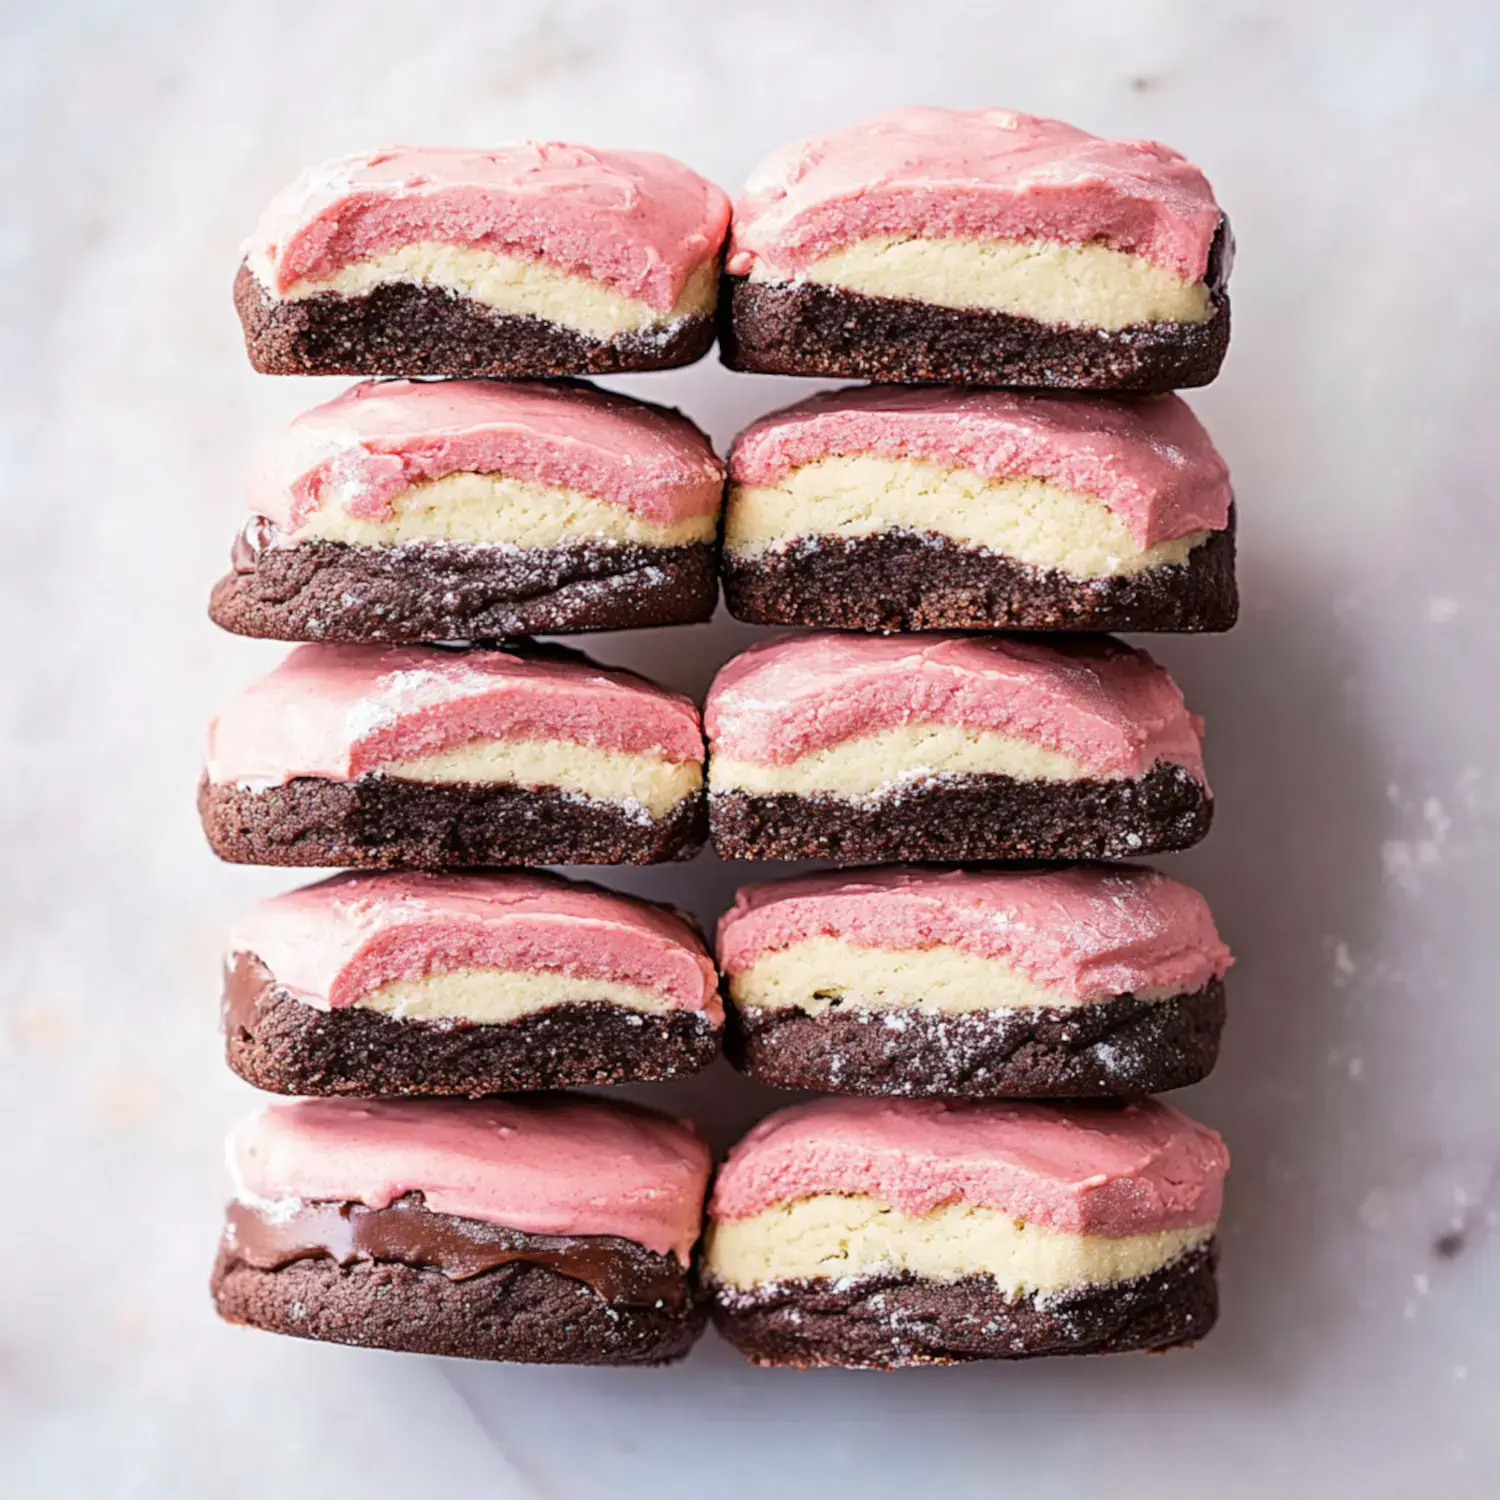
Those Neapolitan cookies light up my kitchen with their stunning chocolate, vanilla and strawberry tiers. Each buttery bite blends flavors just like my favorite ice cream but in a soft, yummy cookie form. Whenever I bake a batch, they end up stealing the show on my cookie plate.
Foolproof Treats
The thing I adore about these treats is how a single dough works such wonders. I bake them for random Tuesdays or fancy gatherings, and they always get folks smiling. Those three pretty colors stacked together with that melt-in-your-mouth buttery feel makes everyone grab seconds.
Your Shopping List
- Main Dough: I grab my go-to butter cookie mix that's loaded with vanilla goodness.
- Chocolate Section: Quality chocolate and cocoa give that rich, dreamy taste.
- Strawberry Section: I mix jam, flavoring and a touch of coloring for that perfect pink.
- Added Flour: A small amount helps when the jam makes things too wet.
- Beaten Egg: Gives that wonderful shine when you add sugar on top.
- Finishing Ideas: I sometimes add big sugar crystals or chocolate coating.
Cookie Creation Steps
- Mix Your Foundation
- I blend my dough until it's completely smooth then split it into three equal parts.
- Add Different Tastes
- Every section gets its own unique flavor - one chocolate, one vanilla, and one sweet strawberry mix.
- Stack Everything Up
- My parchment-lined bread pan makes stacking super easy - strawberry on bottom, vanilla in middle, chocolate to finish.
- Cool It Down
- You can't rush this part - letting it firm up in the fridge means you'll get clean-cut slices.
- Last Little Touches
- I brush some egg white and toss on sugar for that extra pretty shimmer.
Sweet Cookie Magic
These treats make any day feel special. I love how my bread pan does most of the work and how I can switch up flavors when I feel like trying something new. They're fantastic for Christmas or Easter, but honestly, they taste amazing any month of the year.
Handy Hints
Don't skip that cooling time if you want crisp edges and clear layers. I always spend a bit more on good chocolate and flavor drops because you can really taste the difference. I cut them thick when I want soft cookies or super thin when I'm going for extra crunch.
Try These Twists
I like playing around with these treats sometimes - adding coffee to the dark layer makes an awesome mocha flavor. Other days I'll use raspberry instead of strawberry or put shredded toasted coconut in the light section. Every little change brings something new to these pretty layered goodies.
Storage Secrets
They'll stay tasty in a sealed container for about seven days. When I'm planning for upcoming parties, I freeze them flat first, then stack them with paper between each layer. They thaw out great with all the colors and flavors still looking and tasting amazing.
Great Together With
I like putting these cookies on holiday trays next to spicy gingerbread and minty treats. There's nothing better than eating them with hot coffee or tea on a lazy afternoon. They're always the first ones grabbed at family gatherings.
Easy Molding Method
Using a bread pan makes these cookies way simpler than they look. No fussy measuring or rolling needed - just push those colorful layers into the pan and let them chill. You'll get perfect slices every time without breaking a sweat.
Fast Facts
- Flavor Switches: I sometimes add a drop of almond in the white layer or swap in caramel for the brown part.
- Clean Cutting: Use a really sharp knife and push straight down to keep those pretty layers intact.
- Bigger Batches: You can easily double this - just find a larger container or make two separate batches.
 Pin it
Frequently Asked Questions
- → What's the long chill time for?
- Chilling for 3 hours firms up the dough so it slices cleanly. Bonus: it keeps the cookies' shape as they bake.
- → Should I use freeze-dried strawberries?
- Skip freeze-dried strawberries—they don’t bake evenly. Stick to strawberry jam or extract for smooth layers.
- → How do I get neat layers?
- Push each layer down evenly in the pan, let it chill, then use a sharp knife for slicing. Trim the edges if you care about precision.
- → Can I prep these in advance?
- Sure! The dough keeps in the fridge for 4 days or frozen for 3 months. Baked ones also freeze great for 3 months.
- → Why is gel food coloring better?
- Gel colors are vibrant and won’t mess with the dough texture. Liquid coloring might make it soggy.